Designing a tiny home bathroom means solving three challenges at once: constant moisture, strict weight limits, and almost no extra space. Traditional tile can look great, but it adds weight, needs careful subfloor and wall prep, and demands ongoing grout maintenance—tough asks in a compact build.
That’s where shower and wall panels shine. These modern systems offer a smart, tile-free surface that’s lightweight, fully waterproof, and easy to install with basic tools—ideal for DIY builders working in tight footprints. With seamless joints and trim systems, panels reduce the risk of leaks and mould while keeping surfaces smooth and simple to clean.
For tiny homes, cabins, and off-grid setups, panels also save time: fewer parts, faster coverage, and no grout lines to babysit. The result is a bathroom that’s durable, low-maintenance, and space-efficient without sacrificing style.
In the steps ahead, we’ll walk through how to choose, prep, and install shower and wall panels in a tiny home bathroom—so you can get a watertight, great-looking finish on a realistic DIY timeline.
Choosing the Right Shower and Wall Panels
When building or renovating a tiny home bathroom, choosing the right shower and wall panels can make all the difference. The material you select affects not just the look, but also the weight, maintenance, and long-term durability of your bathroom surfaces.
PVC panels are one of the most popular options, especially for small spaces. They’re lightweight, waterproof, and simple to cut to size — perfect for DIY projects where every kilogram counts. Acrylic and laminate panels offer a different finish but can be heavier or require more precise installation. Composite panels, meanwhile, provide excellent strength but might add unnecessary weight in a compact build. For those aiming for a sustainable home, look for panels made from recycled or low-VOC materials such as bamboo fibre or recycled plastics.
For example, companies like Wet Wall Works supply PVC shower and wall panels designed to withstand moisture and temperature changes, making them well suited to tiny homes, cabins, and off-grid living.
In terms of design, the finish you choose helps shape the feel of your bathroom. Gloss surfaces reflect light and can make small rooms feel larger, while matte or tile-effect panels add warmth and texture. Wood-look finishes are also a good way to bring natural character into compact interiors without adding the upkeep that comes with real timber.
Tools and Materials You’ll Need
Installing shower and wall panels is a straightforward project if you have the right gear ready to go. Most of what you’ll need can be found in a basic DIY toolkit, but preparation makes all the difference when working in a confined space like a tiny home bathroom.
Essential tools:
- Tape measure
- Spirit level
- Utility knife or fine-tooth handsaw
- Drill and screwdriver
- Caulking gun
- Straight edge or ruler
- Pencil and masking tape for marking cuts
Installation materials:
- Shower and wall panels (PVC, laminate, or preferred material)
- High-quality waterproof adhesive
- Waterproof sealant (silicone or hybrid)
- Corner trims and joining strips
- Cleaning cloth and mild detergent for prep
Before starting, double-check your wall surfaces for moisture or uneven patches. Smooth, clean walls help panels adhere better and ensure a watertight finish.
Tiny Home Tip: Opt for lightweight or multi-purpose tools wherever possible. Compact, cordless tools make installation easier in small bathrooms and reduce clutter during the build — ideal when every centimetre counts.
Preparing the Bathroom Walls
Preparation is key to a durable, watertight bathroom finish. Before installing your shower and wall panels, take time to ensure your surfaces are clean, dry, and ready for adhesive. Proper prep will help your panels sit flush and stay secure for years to come.
Step 1: Clean the surface
If your bathroom already has tiled walls, you don’t need to remove them. Panels can be installed directly over tiles as long as the surface is sound and stable. Give the tiles a thorough clean using a mild detergent to remove soap residue, oils, and dust. Rinse and allow the area to dry completely.
Step 2: Check for moisture and mould
Inspect the walls for any signs of dampness or mould, particularly around joins or corners. Treat any affected areas with an anti-mould solution and let them dry fully before continuing. Using a moisture meter is a good idea in older or off-grid bathrooms where humidity levels can be high.
Step 3: Level and repair
Even if you’re going over tiles, check that the surface is flat. Fill any cracked grout lines or deep gaps with waterproof filler to create an even base. A level surface ensures the adhesive bonds properly and the panels align neatly.
Step 4: Plan for waterproofing and ventilation
Ventilation is crucial in small or off-grid bathrooms to prevent condensation build-up. Check that your space has an extractor fan, vent, or window for airflow. In timber or lightweight structures, it’s wise to include a moisture barrier behind the panels for extra protection.
Preparing the walls this way means your shower and wall panels will adhere firmly, perform well, and deliver a clean, seamless finish without the need for messy tile removal.
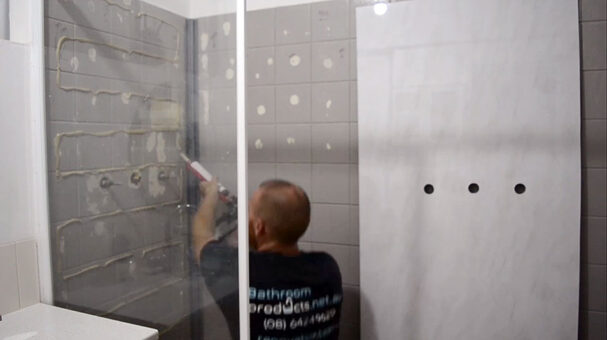
Step-by-Step Installation Process
Once your walls are prepped, you’re ready to install shower and wall panels. The process is straightforward, but accuracy at each stage will make the difference between a quick job and a lasting, professional-looking result.
Step 1: Measure and cut panels to fit
Start by measuring the height and width of each wall section. Transfer these measurements to your panels and mark your cut lines clearly. Use a fine-tooth saw or utility knife for straight, clean cuts. Always double-check your measurements before cutting to avoid waste.
Step 2: Dry-fit panels for alignment
Before applying any adhesive, position the panels against the wall to check that the edges line up correctly and any trims fit neatly. Adjust as needed to make sure joins and corners are straight.
Step 3: Apply adhesive evenly
Apply a generous bead of waterproof adhesive directly onto the wall or the back of the panel in vertical lines or an ‘S’ pattern. Make sure the coverage is even to avoid air pockets. Follow the adhesive manufacturer’s drying and curing times.
Step 4: Press panels firmly in place
Start from one corner and work your way across the wall. Press each panel firmly against the surface, using a level to ensure it sits straight. Wipe away any excess adhesive immediately with a damp cloth.
Step 5: Seal joints with waterproof sealant
Once all panels are installed and the adhesive has set, run a bead of waterproof silicone or hybrid sealant along the joints, edges, and corners. Smooth the sealant with a finishing tool or your finger for a clean, watertight finish.
Step 6: Add trims and finishing touches
Fit corner trims, end caps, and joining strips where needed. These not only provide a neat appearance but also protect edges from moisture. Check all joints and corners for gaps, resealing if necessary.
Pro Tips for Tiny Spaces:
- Cut panels outdoors or in a ventilated area to save space and reduce mess inside the home.
- Use a small roller or timber offcut to press panels evenly against the wall.
- Leave a slight gap (2–3 mm) at the top and bottom of each panel to allow for expansion, especially in humid bathrooms.
With care and patience, your panels will fit snugly and securely, giving your tiny home bathroom a modern, watertight finish that’s easy to maintain.
Maintenance and Longevity
Shower and wall panels are designed to last for years with minimal upkeep, making them a great choice for small and sustainable homes. Regular cleaning and a bit of care will keep them looking fresh and performing well.
Cleaning and maintenance
Wipe down your panels weekly using warm water and a mild, non-abrasive detergent. A soft cloth or sponge is best — avoid scouring pads or harsh chemicals that could dull the surface. Rinse thoroughly and dry with a microfibre towel to prevent water spots.
Inspect the sealant lines every few months to ensure they remain intact. If you notice any peeling or gaps, remove the old sealant, clean the area, and reapply a fresh bead. Keeping the joins sealed prevents moisture from seeping behind the panels.
Repairs and replacements
If a panel becomes scratched or damaged, it can often be replaced individually without disturbing the rest of the wall. Gently cut through the sealant at the joins, ease out the affected panel, and fit a new one in its place following the same installation steps. This modular approach saves money and materials — a win for both your budget and the environment.
Longevity tips
Proper care can extend the life of your panels well beyond a decade. Consistent cleaning, adequate ventilation, and quick attention to minor issues all contribute to better performance over time. For eco-conscious builders, longer-lasting materials also mean fewer replacements and less waste.
Design Inspiration for Small Bathrooms
Once your shower and wall panels are installed, you can use design to make the most of every centimetre of your tiny home bathroom.
Play with texture and finish
Mix panel textures to define zones or add visual interest — for example, a high-gloss finish inside the shower paired with a matte or wood-look surface on adjoining walls. Light-reflective panels help small spaces feel larger and brighter, especially when paired with good lighting.
Integrate clever storage
Think vertically. Add built-in shelving, recessed niches, or narrow cabinets between wall studs to maximise space without clutter. Panels make it easy to integrate these features seamlessly, keeping lines clean and surfaces watertight.
Draw inspiration from real builds
Many tiny home and cabin owners use wall panels to bring modern, low-maintenance style into compact bathrooms. Whether it’s a coastal retreat with bright white gloss panels or a rustic cabin using soft wood tones, panels offer a flexible finish that suits any design direction.
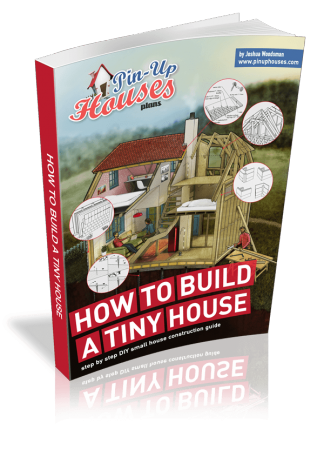
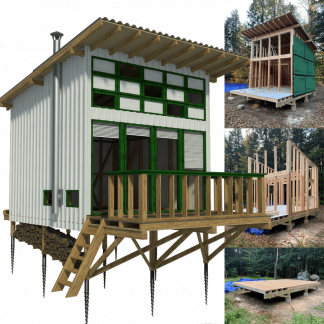
If you’re planning your own small home or renovation, explore the DIY plans and project galleries on Pinup Houses for more inspiration and clever space-saving ideas.
Conclusion
Shower and wall panels are a smart, space-saving choice for tiny home bathrooms. They’re lightweight, waterproof, cost-effective, and easy to install — even for first-time DIYers. With simple tools and careful preparation, anyone can achieve a clean, professional result without the hassle of tiles or grout.
Durable and low-maintenance, these panels are also a sustainable option that suits off-grid and eco-friendly living. Long-lasting materials mean less waste and fewer repairs over time, making them perfect for small spaces built to last. A little panelling can make your tiny home feel like a spa.