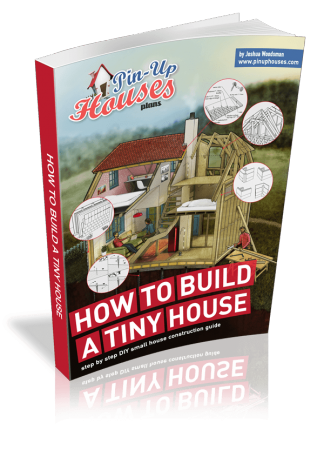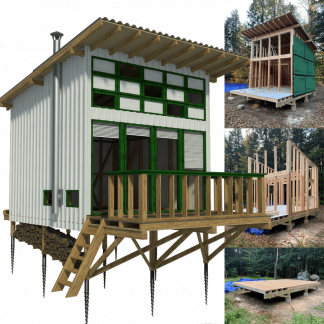

Living in a tiny house changes how outdoor space is used. Every single inch matters. The yard is not just decoration — it becomes a living area, a storage buffer, and often a place to relax or work. That is why planning the landscape carefully is just as important as designing the house itself.
Before moving any soil or buying plants, it helps to sketch ideas and test layouts. A simple way to do that is by using a landscaping layout tool. It makes it easier to see how paths, plants, and furniture will fit together without guesswork. The design process becomes simple and stress-free.
Step 1: Divide the Yard into Zones
People want a place to eat outside. They also need a quiet place to relax. Small spaces need very clear borders. Use simple paths to separate these distinct areas. A stone walkway breaks up the green space nicely. It creates clear separate zones.
Keep the entire layout simple. Too many tiny zones feel cluttered. Pick two or three main uses. Focus strictly on those ideas. A simple stone patio works well. Add a metal fire ring nearby. The Pin-Up Houses aesthetic thrives on clever space usage. Apply this exact logic to the yard. Build a small shed for garden tools. Hide the shed behind a simple wood screen. Everything needs a specific place.
Step 2: Play with Lines and Shapes
Tiny yards often feel narrow. Visual tricks fix this problem easily. Use diagonal lines. A diagonal stone path makes the space look much wider. It draws the eye outward to the far corners.
Horizontal lines work very well in long yards. Place a garden bed straight across the width. This breaks the long tunnel effect. Avoid tall plants along the yard edges. High walls squeeze the available space. Keep the edges low. Choose low wood fences. Permeable borders keep the space open to the eye. The yard will feel much bigger.

Step 3: Build Upward
Ground space disappears incredibly fast. The solution is simple. Look up at the walls. Vertical wall gardens add lush greenery. They leave the ground entirely open. Plants easily grow up the cabin walls. A simple wood trellis works perfectly for this task.
Hang metal pots from the roof eaves. Build a plant wall on a sturdy fence. Strawberries thrive like this. Fresh herbs thrive like this. Vertical setups make great DIY projects. Pallet wood makes cheap and sturdy planters. Nail the wood to a fence post. This approach fits the DIY spirit perfectly. It maximizes the crop yield in minimal space.
Step 4: Use Smart Lights and Reflections
Good outdoor lights change everything. A tiny house needs proper night illumination. Solar lights line the pathways beautifully. String lights hang above the patio area. These small additions create instant warmth. They make the yard fully usable at night.
Mirrors do wonders outdoors too. Place a sturdy outdoor mirror on a garden fence. It reflects the bright sun. It reflects the green plants. The yard suddenly looks twice as big. A small garden pond works the exact same way. The clear water reflects the open sky. It catches the eye quickly. The actual garden size becomes completely unimportant.
Step 5: Pick the Right Plants
Designers follow specific simple rules. Group plants in odd numbers. Three plants look natural together. Five plants look natural together. Even numbers look rigid and fake. Mix different plant textures. Place smooth leaves next to fuzzy leaves. Mix tall grasses with low bright flowers.
Pick tough native plants. They survive local weather easily. They need less water. They require far less work. Layer the plant heights carefully. Put tall plants in the back row. Put medium plants in the middle row. Put short ground covers in the front row. This simple trick adds deep visual depth. Depth makes small beds look thick and full.

Step 6: Build Smart Hardscapes
Grass takes too much daily work. It needs constant water. It needs regular cuts. Hardscape materials offer a great alternative. Use simple pea gravel. Lay down large flat stone pavers. Build a simple wooden deck. These materials fit the rustic cabin vibe perfectly. They handle heavy foot traffic well.
DIY gravel paths are very cheap to build. Dig a shallow dirt trench first. Lay down tough landscape fabric next. Pour the gravel over the fabric. Spread the loose rocks out evenly. The path drains well after heavy rain. It looks very clean. Add a tough metal border. This keeps the stones firmly in place.
Step 7: Keep Furniture Flexible
Big outdoor sofas block narrow paths. Bulky chairs waste precious space. Choose collapsible patio furniture instead. A collapsible wood table stores flat against the exterior wall. Stackable metal chairs hide away easily inside a small shed.
Multi-purpose items work best in tight spots. A sturdy wooden box stores garden tools safely. It also acts as a nice bench. Build custom wood benches right into the deck rails. This completely skips the need for extra patio chairs.
Step 8: Focus on the Entrance
The front door area matters a lot. It welcomes guests warmly. A clean path to the door sets a good mood. Plant bright red flowers near the wood steps. Place two large pots near the main entrance. Fill them with colorful local plants.
Paint the front door a bright cheerful color. Add clear metal house numbers. Install a nice glass porch light. These tiny details matter greatly. They make the whole property look totally finished. They make the tiny house look like a real home.
Step 9: Plan for Easy Upkeep
A yard should bring daily joy. It should never cause stress. Choose low-care yard materials. Pick durable local plants. Spread thick wood mulch in the flower beds. Mulch blocks the stubborn weeds. It holds moisture deep in the dirt.
Install a simple drip water hose. This saves hours of manual work. Place the hose right under the mulch. The plants get water directly at the roots. The system saves fresh water. The yard stays green with near zero effort.
Final Thoughts
Landscaping around a tiny house isn’t about cramming as much as possible into a small space. It’s about being intentional. It’s about creating a flow between your indoor life and the outdoors.
By using height, choosing the right scale of plants, and defining your zones, you turn a small patch of grass into a functional extension of your home. Take your time, start small, and enjoy the process. Your tiny house deserves a big personality on the outside, too.