You spend months on a build. Weekends, evenings, a vacation day burned on a good weather window. Then one day it’s done. The sawdust gets swept up, the tools go back on the wall, and you walk out the door and that’s it. No ceremony. No record. Nothing tells the next person who stands inside that thing that it was made by a human, by hand, in a specific year.
This is where the tradition of builders plaques comes in, and it’s a tradition worth reviving.
For most of architectural history, people who built things marked their work. Stonemasons left maker’s marks in the stone. Shipbuilders bolted maker plates onto the bulkhead of every vessel they launched. Historic homes and civic buildings carried cornerstone plaques with the name of the architect, the builder, and the year. It was how a building told its own story. Somewhere along the way, residential DIY dropped the habit. Your grandfather’s tool shed was probably built in 1962 by someone whose name is now forgotten. Your cabin doesn’t have to be.
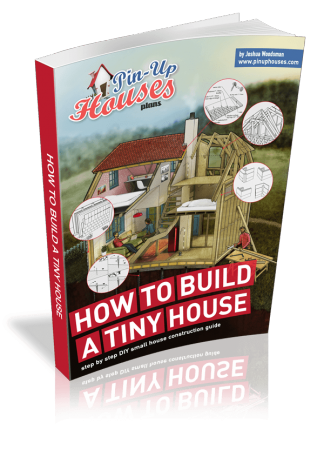
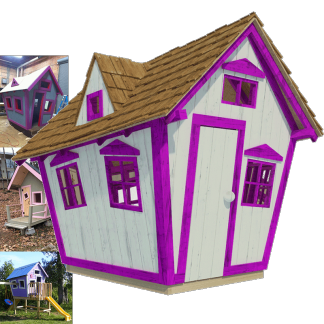
This guide covers what a builders plaque is, what to put on one, which materials hold up outdoors, how to install it, and where to actually get one made. Whether you’re finishing a small garden shed, a DIY cabin build, a playhouse, a sauna, or a shepherd’s hut, the process is roughly the same, and the payoff compounds every year.

What a builders plaque is (and how it differs from other plaques)
A builders plaque is a small, durable marker that records who built a structure and when. That’s the core of it. Some go further and list the architect or designer, the materials, a dedication, or a motto. Formats vary, but the function doesn’t.
It’s worth being clear about what a builders plaque isn’t, because the terms get mixed up constantly. It isn’t a memorial plaque, which commemorates a person who has died. It isn’t a dedication plaque, which marks the opening of a public building or the naming of a space in honor of someone. It isn’t a historical plaque or historical marker, which is usually issued by a local historical society or a state register to recognize a property’s significance (the National Park Service’s National Register of Historic Places is the federal program for this). It isn’t a donor plaque, a recognition plaque, or an award plaque, each of which acknowledges a different kind of contribution. Those are cousins. The builders plaque tradition is older than all of them, and it’s specifically about the making of the thing.
The nautical world kept the tradition alive better than any other. Ship name boards and shipbuilders maker plates are still standard practice on custom boats. The boatbuilder who built your wooden skiff in 1978 probably riveted a brass plate on the inside of the hatch saying exactly that. There’s no reason a cabin, sauna, workshop, or tiny house build shouldn’t get the same treatment.
Why it’s worth putting one up
A few honest reasons.
First, it’s a record. Future owners, and more importantly future repairs, benefit from knowing what year the structure went up and what it’s made of. A plaque that notes the year, the builder, and ideally the primary lumber used (white cedar, pressure-treated pine, reclaimed oak) can save a future renovator a week of guessing.
Second, it’s a gift to your kids. They will point at that plaque in twenty years. That is not a soft-focus abstraction. It’s what actually happens.
Third, it gives the project a real end. DIY builds tend to fizzle out because the last 5% drags on for months. Committing to a plaque with a specific year on it is a hard stop. It closes the build.
Fourth, it’s a tradition worth keeping alive. Structures with names and maker’s marks tend to survive longer than anonymous ones, partly because people take better care of things that have names.
Iain Ross Wallace MA said “Mason’s Marks are a sequence of lines cut into the face of a piece of carved stone to indicate who worked that stone.”
What to put on a builders plaque
The classic template is short. Less is more here. A plaque that reads like a tax document is worse than no plaque at all.
A standard builders plaque includes the name of the structure (if it has one — “The Workshop,” “Gull Cottage,” “Rose Cabin”), the year built, and the builder’s name. That’s it. Three lines. Whatever else you’re thinking about adding, you probably don’t need it.
If you want to go further, the reasonable additions are a designer or architect credit if the plans came from someone else, a short dedication (“For Ellie, who helped dig the footings”), or the GPS coordinates of the site. Coordinates are a nice touch for remote cabins. A motto or Latin inscription is where things start to feel forced. Skip it unless it’s genuinely yours.
Keep the whole thing legible. A plaque that packs ten lines of 14-point text onto a four-inch surface just looks like a warning label. Err toward fewer words, bigger letters.
Choosing a material
This is where the decision actually matters, because a plaque is going to live outdoors for decades. The material determines whether it still looks good in 2055 or whether it’s a faded blotch on a rotting board.
Cast bronze plaques are the heritage standard. If you’ve ever seen a plaque on a government building or a war memorial, that’s almost certainly cast bronze. It’s heavy, it patinas beautifully as it ages, and it will outlast the structure it’s mounted on. Cast bronze plaques from the 1800s are still legible today. The tradeoff is cost. A modest cast bronze plaque runs several hundred dollars at the low end, and larger pieces move into the thousands. The Copper Development Association has good technical documentation on how bronze and brass weather if you want to read up before committing. For a cabin you built with your own hands and intend to pass down, bronze is hard to beat. It’s also fully recyclable, which puts it on the right side of the sustainable materials conversation.
Brass plaques sit in the same family. Warmer tone, a little softer than bronze, more common on nautical applications. Brass darkens faster if it isn’t polished, which some people like and some don’t.
Cast aluminum and anodized aluminum plaques are the modern practical answer. They weigh a fraction of what bronze does, cost a fraction, and hold up well outdoors when properly anodized. Anodized aluminum accepts color, which opens up design options: black, dark bronze, painted finishes, and photographic detail through a process called sub-surface printing. For most DIY builds — sheds, playhouses, saunas, even many cabins — anodized aluminum is the honest best-value pick.
Etched metal plaques use acid or laser to cut the design into the metal surface, then fill the recesses with paint or enamel. The result is a crisp, high-contrast plaque that reads well from a distance. Etching works on bronze, brass, aluminum, and stainless steel.
Engraved plaques (including laser engraved work) use a cutting tool or laser to remove material from the surface. Laser engraving gives exceptional detail for fine text, custom logos, and even engraved photos. Laser engraving on anodized aluminum is probably the sweet spot for detail-heavy designs, because the anodized layer contrasts sharply with the aluminum revealed underneath.
Sub-surface printing is a newer option that prints a full-color image under a protective anodized aluminum surface, making it weatherproof and UV-resistant. This is how you get photographic images on an outdoor plaque that won’t fade within a season.
Custom metal emblems deserve a mention as a related option, especially if you want something more sculpted than a flat plaque. These are manufactured metal pieces, typically aluminum, brass, bronze, or zinc alloy, with your design die-struck or cast into the metal and often filled with enamel color. They combine the durability of a cast plaque with the dimensionality of a sculpted piece, and they tend to be more affordable than equivalently-sized cast bronze. Specialty fabricators that produce custom metal emblems for architectural use offer weather-rated finishes and mounting options (screws, adhesive, rivets, bent legs) that work across wood, masonry, and metal surfaces.
Wood plaques belong in this list mainly as a warning. A wooden plaque looks great on day one and terrible five years later unless you maintain it aggressively. Unless you’re prepared to re-seal and re-stain it every two years, skip wood. The whole point of a builders plaque is that it outlasts the memory of the build.
Design considerations
Font matters more than people think. A serif face like Trajan or Optima reads traditional and holds up at small sizes. Sans-serifs like Helvetica or a clean grotesque read contemporary and work better on minimalist builds. Script and handwritten fonts are a minefield: they look charming at full size in the design file and become illegible on a three-inch plaque.
Text length drives everything else. Write your copy first, count the lines, then size the plaque to fit comfortably. It’s better to order a four-inch plaque with generous margins than a three-inch plaque crammed corner to corner.
Custom logos and custom artwork are where a good fabricator earns their fee. If you’ve got a family crest, a farm logo, or a line drawing of the structure itself, almost any custom plaque or emblem shop can incorporate it. Personalization options vary by shop, but most will work from a rough sketch if that’s all you have. Always get a free proof before production starts. Any shop worth using will send one, usually within a few business days, and will let you request revisions before you pay.
Mounting and installation
How you mount the plaque depends on what you’re mounting it to and how permanent you want it.
For wood siding or log construction, screws into pilot holes are the standard move. Use stainless steel hardware, not zinc-plated. The mounting hardware will outlast your grandchildren, so don’t cheap out on it. Countersink the pilot holes slightly so the screw heads sit flush or just below the surface. This matters more than you’d think, because a proud screw head creates a water catchment that eventually rusts.
For masonry, stone, or concrete foundations, you’re looking at masonry anchors: tapcons, lead shields with screws, or epoxied studs for heavier cast bronze pieces. If you’re mounting to a chimney, foundation, or masonry wall, drill carefully and set the anchors with some cure time before loading.
Adhesive mounting works for lighter aluminum plaques on smooth surfaces, but it isn’t what you want for anything heavy or for a surface that sees freeze-thaw cycles. Adhesives fail eventually. Mechanical fasteners don’t.
Bent-leg mounts (common where the plaque attaches through fabric or thin sheet material) and rivet mounts exist for specialty cases. Most fabricators let you specify the mounting style when you order. If you’re not sure which to pick, ask for samples. Most shops will send you a couple of different mounting options to test on your specific surface before you commit to a full order.
Mount the plaque beside the main door at roughly eye level for an average adult, five to five-and-a-half feet off the ground. Morning light is ideal. The plaque will catch the light and read well for the hours you’re most likely to walk past it.
Getting one made
Most custom plaque and emblem work follows a similar process. You send in your design (or rough notes if you don’t have a design yet), you get a quote, you approve a free art proof, you pay, and production runs three to four weeks. Cast bronze tends to take longer because casting is slower. Laser-engraved aluminum can sometimes be done in a couple of weeks.
A few things to check when picking a shop.
They should offer a free proof before you pay. Shops that want full payment before showing you a design are a red flag. Minimum order quantities matter, because for a one-off plaque you want a fabricator that will do single units rather than requiring bulk orders. Most custom plaque and emblem makers do single pieces as a matter of course, but confirm before you commit. Ask for physical samples of finishes and plating options: seeing a brushed-bronze or antique-nickel finish in a photo is not remotely the same as holding one in your hand. Finally, check that they handle the mounting style you need. If you’ve got a specific surface or a non-standard fastener requirement, confirm the shop can accommodate it before ordering.
Turnaround on a custom plaque or emblem is typically three to four weeks from approved proof, which means if you want the plaque up by a specific date (a dedication event, a birthday, the season you plan to open the structure for visitors), back-plan eight to ten weeks to allow for design revisions, production, shipping, and installation.

One thing you’ll wish you’d done
The only regret people report about putting up a builders plaque is that they wish they’d done it sooner, with more thought about what to write. The only regret people report about not putting one up is at year fifteen, when they’re staring at their own workmanship and realizing nobody but them will ever know who made it.
A plaque isn’t the point of the build. But for a few hundred dollars and an afternoon of installation, it’s probably the single highest-leverage detail you can add to a finished structure. It tells the truth about what the thing is: a human-made object, made by a specific person, in a specific year, for reasons that mattered at the time. Put one up.