In a full-size kitchen, a six-inch planning mistake may produce an inconvenient corner or an extra filler panel. In a tiny-house kitchen, the same mistake can block the refrigerator, eliminate a prep area, or leave two cabinet doors unable to open at the same time.

Limited space does not make cabinet planning simpler. It makes every measurement and sequence more consequential.
The kitchen may share one open room with the dining and living areas, while its cabinets also need to hold pantry goods, cookware, cleaning supplies, and sometimes mechanical equipment.
Before choosing a door color or countertop, settle the following seven decisions.
1. Decide what the kitchen must hold
Start with the way the kitchen will be used. Someone living in a tiny house full time may need considerably more food storage than someone building a weekend cabin. A frequent cook may prioritize a full sink, oven, and uninterrupted prep area, while another household may prefer a two-burner cooktop and more pantry space.
List the items that must fit before assigning cabinet widths. Include countertop appliances, recycling bins, dishes, pans, dry food, cleaning products, and any equipment that cannot be stored elsewhere.
Our small-kitchen design guide takes the same space-first approach, emphasizing full-height storage, compact appliances, clear work surfaces, and layouts based on the room’s actual limitations.
The aim is not to fit the greatest possible number of cabinets. It is to give each essential item a practical location without making the room difficult to move through.
2. Build the layout around exact appliance dimensions

Appliances should be selected, or at least narrowed to specific models, before the final cabinet order. Nominal dimensions do not reveal the full installation requirement. Refrigerator doors may need side clearance to open beyond 90 degrees, cooktops require prescribed spacing, and dishwashers need room for plumbing, wiring, and an open door.
Download the manufacturer’s specification sheet for every appliance. Mark the overall width, depth, ventilation clearance, connection points, and door swing on the plan.
Once those fixed dimensions are established, standardized cabinet sizes can fill the remaining run. If you are comparing ready to assemble wood kitchen cabinets can review multiple cabinet collections, order samples, and request design assistance before committing to the layout.
RTA Wood Cabinet’s lines use plywood boxes, solid-wood face frames, dovetail drawer boxes, and soft-closing hardware, although specifications should still be checked for the exact collection being ordered.
This is also the stage to test the plan visually.
We recommend planning furniture before construction begins, since built-ins, kitchen units, seating, and circulation all compete for the same small footprint.
3. Choose drawers or doors based on access
Deep drawers are often useful in a compact kitchen because their contents come toward the user. Pots, bowls, pantry containers, and small appliances remain visible instead of disappearing behind items at the front of a fixed shelf.
Door cabinets still have a role. Sink bases must accommodate plumbing, and a cabinet with an adjustable shelf may suit tall or irregularly shaped equipment. The right choice depends on what will live inside each cabinet.
Map storage by activity. Cooking tools should sit near the cooktop, dishes near the sink or drying area, and frequently used food within easy reach. Avoid using a valuable base cabinet for objects that are only needed a few times each year.
Drawer clearances must also be checked against opposite walls, ladders, fold-down tables, and nearby appliance handles. A drawer is only useful when it can open fully.
4. Reserve space for fillers and door clearance

A plan that fills the wall with cabinet boxes down to the final fraction of an inch will rarely install as neatly as it appears on screen. Walls may bow, corners may be out of square, and finished dimensions can change once wall cladding is installed.
A filler is a narrow matching strip between a cabinet and an adjoining surface. It gives doors and drawers room to clear walls, trim, and neighboring handles. It can also be scribed, meaning trimmed to follow an uneven wall.
Pay particular attention to corner conditions. A drawer beside a projecting wall or door casing may require more clearance than expected. Refrigerator doors can also collide with adjacent panels when their hinge requirements have not been considered.
Measure each wall at the floor, counter height, and upper-cabinet height. The smallest measurement, not the largest, usually controls what can fit.
5. Decide where vertical storage earns its space
Tall storage is valuable in a tiny house, but it should be used selectively. A full-height pantry can hold food, a microwave, cleaning supplies, and small appliances within one compact footprint. Upper cabinets extended toward the ceiling can store lightweight or seldom-used items.
Too many tall cabinets, however, can make the room feel enclosed and reduce usable countertop length. In a narrow house, they may also block daylight from a nearby window.
Place the tallest cabinet where it will have the least effect on sightlines, often at the end of a run. Check the ceiling slope before ordering, particularly beneath a loft or pitched roof. Upper trim may need to be scribed around framing irregularities.
Open shelves can make a small kitchen appear lighter, but they do not replace concealed storage. Everyday visual clutter becomes more noticeable when the kitchen is visible from the entire home.
6. Coordinate cabinets with utilities and work surfaces
Cabinet planning cannot be separated from plumbing and electrical work. A sink base must align with supply and waste lines, an electric cooktop needs the appropriate circuit, and a vented appliance requires a route that works with the wall and roof construction.
Resolve these systems before closing the walls. Moving a drain after cabinets arrive can affect the sink position, drawer configuration, and countertop cutouts.
Installation order matters too. Base cabinets should be leveled across the complete run before countertop templating.
Adjacent cabinet boxes must be clamped into alignment before they are secured together, and finished toe-kick material is generally fitted after leveling so it can conceal shims and slight floor variation.
Electrical, plumbing, gas, ventilation, and structural work should be completed by appropriately qualified professionals where required.
Permit and inspection rules vary by jurisdiction, including for tiny houses on foundations and units built on trailers.
7. Plan where assembly and installation will happen
Ready-to-assemble cabinetry can suit a self-build project, but flat-packed does not mean it requires no working space. Doors, panels, drawer parts, and cabinet boxes need a clean, level assembly surface protected from weather and construction debris.
Before delivery, decide where packages will be stored and where each unit will be assembled. Sort boxes according to the cabinet schedule rather than opening everything at once. Confirm that large assembled cabinets can pass through the tiny house doorway before completing them outside.
The supporting wall must also be ready. Cabinet fasteners need to engage suitable framing or blocking, especially in a structure that may be transported. For a tiny house on wheels, cabinet attachment, overall weight, and load distribution should be coordinated with the builder or engineer responsible for the structure.
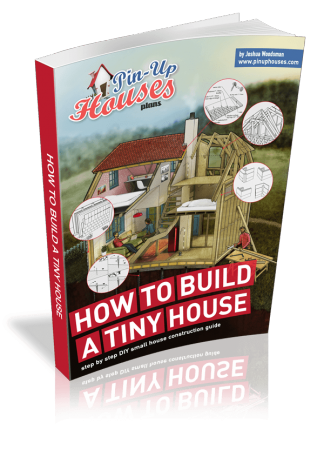
This reflects a broader lesson in planning a tiny house as a complete system: interior choices, storage, movement, structure, and utilities cannot be treated as unrelated decisions.
Make the cabinet plan before the cut list
The best tiny-house kitchens do not feel successful because they contain miniature versions of every conventional feature. They work because the homeowners decided what mattered, selected appliances early, protected operating clearances, and coordinated cabinetry with the structure and utilities.
Treat fillers, drawer openings, toe kicks, service routes, and assembly space as part of the design rather than installation details to solve later.
In a room where every inch has several potential uses, careful cabinet planning is what turns limited square footage into a kitchen that supports daily life.