If you wire your garage for a single 15 amp circuit, you’ll run the table saw, trip the breaker, walk to the panel, reset it, and trip it again. I did that for about four months. Then I bought a bigger saw, and the garage got its own subpanel the following weekend.
The mistake wasn’t the saw. It was assuming the garage could run on whatever the builder left behind. If you’re planning a shed or a garage workshop, the wiring plan has to come first, before the studs go up, because everything after that gets harder and more expensive. Treat the electrical layout as the schedule that forces the other decisions, not as a chore you’ll get to later.


How you plan that layout depends on a few things: which tools you actually run, where each machine sits, and who does the work. A lot of owners pull a permit for a subpanel and handle the finish work themselves, while hiring a licensed electrician for the panel and the final hookups. Anyone doing that has usually sat through some form of electrical contractor training, and that level of grounding is worth understanding even if you’re paying someone else, because you’re the one who has to describe what you want.
Start With an Amp Budget, Not a Tool List
Every tool list on the internet says “add up your tools” and stops there. That’s useless, because you never run everything at once.
Here’s the method I use now. I call it the two amperage buckets. Bucket one: the one machine that needs the most power, and nothing else. That’s your worst moment. Bucket two: the regular combination, meaning lights, a dust collector, a shop vac, a compressor, or a battery charger humming in the corner, plus whatever you’re actually cutting with. You plan for whichever bucket is hungrier, then add roughly a quarter more as headroom.
Do the math in a column on paper, not in your head. A 120 volt table saw pulling around 15 amps is near the top of the range for a standard household circuit, and a shop vac or dust collector adds several more amps right when you need both running. A compressor cycling on in the middle of a cut is the classic breaker popper.
The payoff is that the number tells you whether you’re building a 20 amp circuit garage or a 60 amp subpanel garage. That answer decides your wire gauge, your outlet layout, and whether you can skip the extension cord you’ve been dragging across the floor.
Why the Garage Panel Deserves Its Own Breaker Space
A detached structure with its own subpanel gives you something the main panel can’t: room to grow without rewiring the house. You run one feeder out, land it in a panel, and then every circuit after that is a short trip back to that box.
Put the subpanel somewhere you can stand in front of it with the door open, not behind the miter saw bench. Think about where you’ll stand when you’re covered in sawdust and something has gone dead. That spot is the panel location.
Separate the lights from the outlets. Two circuits, minimum. When you trip a tool, you don’t want to be standing in the dark next to a spinning blade. And use a GFCI on the outlets near the bench, the door, and anywhere a cord might sit on damp concrete.
The electrical code sets the floor here, and it’s there for a reason. According to the National Fire Protection Association, which publishes the code most jurisdictions adopt, garage receptacles are treated differently from bedroom outlets for exactly this reason. Your local inspector is the final word, so ask before you buy wire, not after.
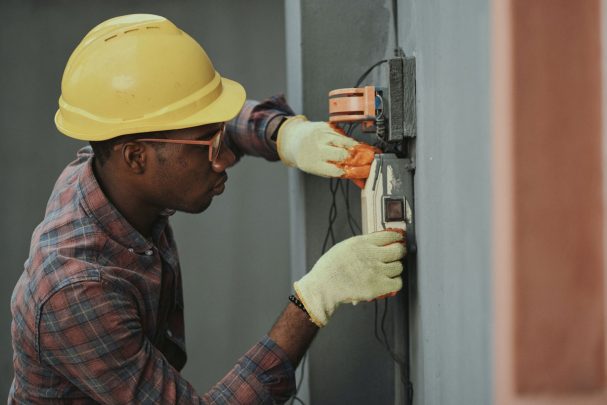
Outlet Layout: Plan for the Tools You Don’t Own Yet
Nobody regrets too many outlets. They regret running one at chest height behind a bench they can no longer move.
Place outlets just above bench height, roughly 48 inches off the floor, so a sheet of plywood leaning against the wall doesn’t cover them. Space them so no point on the bench is more than a few feet from one. Add a dedicated circuit for the welder or the big compressor if either is in your future, and figure the run for a 240 volt line even if you’re not installing it this year. Pulling the wire while the walls are open costs almost nothing compared to retrofitting it later.
Run conduit on the surface if your walls are already finished. It looks industrial because it is, and it costs a fraction of tearing out drywall. I’d surface-mount conduit in a finished garage every time. Chasing wire through insulation you already paid for is the version of this project that makes people quit halfway through.
Label every breaker the day you close the panel. Use a real label, not a pencil scribble. In three years, when the lights flicker, you’ll want the answer in ten seconds instead of twenty minutes.
Working Safe in a Tight Space
Garage workshops are small, and small spaces hide hazards in plain sight.
Keep the area around your panel clear. Don’t store paint cans or the shop vac in front of it, no matter how convenient the shelf looks. Leave yourself a path. If you’re working in a tight structure, air movement matters for power tools, and the U.S. Department of Energy publishes guidance on ventilation and building performance that’s worth a read before you button up the walls.
Get a fire extinguisher rated for electrical fires and mount it near the door, not across the shop behind the table saw. Check the cord on every tool you bought secondhand. A cracked jacket on a $20 garage sale router is how a cheap tool turns into an expensive afternoon.
Here’s my opinion, and it’s not popular with the “just watch a video” crowd: if you’ve never opened a panel, hire the electrician for the feeder and the panel, then take over from the first outlet. You’ll learn more from watching a pro terminate real conductors than from a month of tutorials. It’s a cheaper education than a fire.
Tools, Layout, and the Order of Operations
Sequence matters. Do it in this order and you’ll skip most of the backtracking:
- Write your amp budget, both buckets, before you buy anything.
- Decide service size and panel location, then confirm it with your inspector.
- Frame and sheath the walls, then drill and run the rough wiring.
- Rough inspection, then insulate and finish.
- Outlets and fixtures, then final inspection, then power on.
Plan the bench and the machine placement before the wire goes in. Where the table saw lives determines where the dust collector plugs in, and where the dust collector plugs in determines whether you’re running a long cord across the walking path. Get the tools where you want them, then run the lines to meet them, not the other way around.
If you’re also insulating and sheathing, do the wiring while the studs are bare. The order saves you cutting access holes you’ll patch badly later. And measure your door swing before you hang that first outlet box. I’ve seen a subpanel end up behind a garage door track, which is a mistake you only make once.
What This Costs You in Time
A subpanel plus a handful of circuits is a weekend for the rough-in and an afternoon for the trim, assuming you’ve got the plan on paper first. Skip the plan and it turns into three weekends and one argument with your inspector.
Start with the amp budget this week, before you buy a single outlet. When your garage finally has its own panel, the saw starts on the first pull, the lights stay on, and the extension cord retires. Which circuit are you adding first?