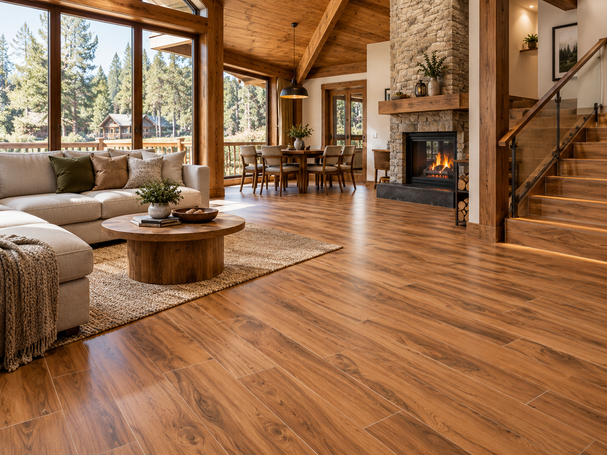
A cabin floor may look simple on a mood board: long planks, visible grain and a few earthy shades. The installation underneath can be much less simple.
Wood-look tiles for cabins are ceramic, vitrified or porcelain tiles made with a wood-inspired surface. They are not timber flooring. That difference matters because tile and wood respond differently to the floor below them, moisture, movement and changes in temperature.
Before choosing a plank pattern, look at the cabin itself. A tiled floor needs a suitable base, enough structural support and an installation plan that takes movement into account.
Start With the Cabin Floor, Not the Wood Pattern
Cabins are not all built the same way. Some have concrete bases, while others use raised timber-framed floors. An existing cabin may also have an older floor assembly that was never planned for tile.
The timber subfloor condition should therefore be checked before ordering the floor finish. Look for movement, damaged panels, moisture problems, loose areas or noticeable flexing.
Another question is the floor structure and tile weight. Tile, mortar, underlayment and other parts of the assembly add load. Whether the existing structure can take that assembly depends on how the floor was designed and built.
Do not try to judge structural suitability from the tile thickness alone. An installer or relevant building professional should assess the actual floor assembly where there is any doubt.
Flatness Matters More With Long Planks
A wood-grain surface can hide plenty visually. It cannot correct an uneven base. Good floor flatness becomes particularly important with long rectangular tiles. High and low areas underneath can make adjoining tile edges harder to align and may contribute to lippage.
Before installation starts:
- Identify dips or raised areas
- Repair unsuitable or damaged sections
- Use the preparation method recommended for the substrate
- Check the tile manufacturer’s installation requirements
- Confirm that the chosen mortar or system suits the base
The longer the plank, the less forgiving an uneven floor can become.
Think About Seasonal Movement in the Cabin
Cabins that go through changing indoor temperatures need the tile assembly planned accordingly. Materials in the floor can expand and contract as moisture, temperature and loading change. That makes seasonal temperature changes part of the installation discussion rather than just a comfort issue.
Proper movement joints allow parts of a tiled assembly to accommodate movement instead of locking the entire floor tightly against walls and other fixed surfaces. Their position and spacing depend on the project, floor size, exposure and installation system. Do not fill intended movement spaces with rigid grout simply to make the floor look uninterrupted.
Where Can Wood-Look Tile Work in a Cabin?
There is no need to use one flooring material from the entrance to every corner of the building. Start with the rooms where the practical requirements and the particular tile line up.
Cabin Living and Sleeping Areas
For dry interior spaces, wood-look tile flooring for cabins can be considered where the base is suitable for tile and a hard tiled surface suits how the cabin will be used. The wood pattern can range from quiet straight grain to knots, weathered marks or stronger shade changes.
For a smaller floor plan, keep the layout in proportion to the room. Many small cabin flooring ideas use one floor direction across connected areas rather than changing the plank direction each time the room changes. Furniture placement matters too. A bold grain that looks balanced across an empty floor may appear quite different once much of it sits beneath beds, sofas or cabinets.
Cabin Kitchens
Spills and regular cleaning make the kitchen a different setting from a bedroom. When selecting wood-look tiles for cabin kitchens, check the actual product’s floor suitability, surface finish and cleaning guidance. Do not assume every wood-effect tile is meant for a kitchen floor.
The plank layout also needs to work around:
- Cabinet runs
- An island, if present
- Appliance openings
- Doorways
- Narrow edge cuts
A long plank may look straightforward in the centre of the room but become awkward when it reaches several fixed cabinets.
Cabin Bathrooms
A wood pattern can continue the visual language of the cabin without using natural timber on the floor. That is one reason people may look at wood-look tiles for cabin bathrooms. The design comes second to the wet-area specification.
Check the tile’s wet-area suitability and review the available slip resistance rating for the actual product. A matt surface is not automatically anti-skid, and no tiled floor should be described as slip-proof.
The tile also does not replace bathroom waterproofing. Waterproofing, slope, drainage, substrate preparation, adhesive and grout need to be planned as parts of the complete assembly.
Cabin Entryways
Entry floors may receive wet footwear, dirt and grit from outside, depending on how the cabin is used. For wood-look tiles for cabin entryways, look at the actual floor conditions first. A product suitable for a dry bedroom is not automatically the right choice near an exterior door.
Also look at what flooring comes next. An entryway is a common place for tile to meet timber, carpet or another surface, so the finished floor heights should be planned before installation.
Choose the Plank Size With the Room in Mind
The wood appearance often comes from the tile’s proportions as much as its printed grain. Long wood-look plank tiles can resemble floorboards when laid in rows, but the right format still depends on the room dimensions and the condition of the floor.
Before deciding on the plank tile size, map a few rows across the actual room. Look at:
- The number of full planks that fit across the width
- Narrow pieces that may be left at walls
- Doorway cuts
- How the plank meets fixed cabinets
- Whether several boxes will be needed to show enough grain variation
There is no reason to choose the longest available plank if it creates awkward cuts throughout a compact floor.
Decide Which Way the Planks Will Run
The tile laying direction should be worked out before the first row goes down. Possible reference points include the longest wall, the main line of sight or the direction that works through connected rooms. None of these is a fixed rule for every cabin.
Draw out the floor or dry-lay several pieces first. A change in direction may make sense in a clearly separated room, while an open-plan cabin may benefit from keeping the planks running consistently through the connected area.
Do Not Automatically Use a Half-Plank Offset
A traditional 50% brick pattern is not always appropriate for long rectangular tile. With a staggered plank layout, the permitted offset should come from the tile manufacturer’s instructions. Some long plank products limit the overlap because slight curvature in rectangular tiles can make lippage more noticeable when the centre of one plank lines up with the end of another. This is one detail worth settling before installation rather than choosing the pattern by eye on site.
Mix the Grain Before the Tiles Are Fixed
Natural timber boards rarely repeat in exactly the same way. Wood-inspired tiles may therefore come with several printed faces or noticeable shade differences. Look at the stated wood-grain variation before buying.
During installation, opening several boxes and arranging pieces before they are fixed can help you spot:
- Repeated grain faces sitting together
- Similar knots appearing in one area
- Unexpected shade changes
- Planks that you would rather move elsewhere in the layout
Do this before adhesive is applied. Once the floor is fixed, rearranging a repeated section is no longer simple.
Choose Grout for the Actual Tile, Not for Real Wood
Tile needs joints even when the aim is a floorboard-style appearance. For grout color selection, compare the grout against several shades within the tile rather than only one plank. A closer color can make joints less noticeable, while a contrasting grout will make each plank outline clearer.
Neither approach is automatically right. The joint width should follow the tile and installation requirements. Do not force an extremely narrow grout joint simply to imitate timber boards.
Look Beyond Matt Finishes
The tile surface finish affects reflection, visible texture and maintenance, but the finish name alone does not tell you whether a tile suits every cabin floor. A wood-look tile may be matt, textured, satin or another finish depending on the collection.
Check:
- Floor or wall specification
- Expected foot traffic
- Cleaning guidance
- Wet-area information where relevant
- Product-specific slip data
A deeply textured surface may suit one location but require more attention when cleaning than a flatter surface. The actual product should guide the decision.
Plan Where Tile Meets Real Wood
A cabin may use tile in the bathroom and kitchen while keeping timber flooring elsewhere. These tile-to-wood floor transitions need more than a strip fitted at the end of the job.
The finished heights of both floors should be known early because the tile assembly may include underlayment, mortar and the tile itself. A height difference can affect the type of transition detail required.
Transitions are also places where movement between different materials needs to be handled correctly. Plan them at:
- Doorways
- Changes between rooms
- Open-plan floor zones
- The point where an older wood floor meets new tile
Do not assume the tile and timber can simply be grouted tightly together.
What to Check Before Ordering Wood-Look Tiles for a Cabin
By the time you choose the grain and color, several practical questions should already have answers. Before ordering wood-effect tiles for cabins, go through this list:
- Check the existing floor structure: Make sure the base is suitable for the planned tile assembly.
- Assess the subfloor: Movement, damage and uneven areas should be dealt with before tiling.
- Confirm the application: A wood-look wall tile is not automatically suitable for a floor.
- Choose the plank size around the room: Check cuts and layout rather than relying on the sample alone.
- Read the laying instructions: Pay particular attention to stagger and joint recommendations.
- Review wet-area information separately: Kitchens, bathrooms and entries may have different requirements.
- Plan movement and transitions: These details should not be left until the final row of tiles.
If you are considering wood-look porcelain tiles for cabins, the same checks still apply. Porcelain describes the tile body; it does not remove the need for proper substrate preparation and installation.
Summing Up
Rustic wood-look floor tiles can bring grain, plank lines and timber-inspired color into a cabin without turning the floor into real wood. The result still depends on what sits underneath the tile and how the room is used. Before choosing the final design, sort out the floor structure, flatness, layout, wet-area requirements and transitions.