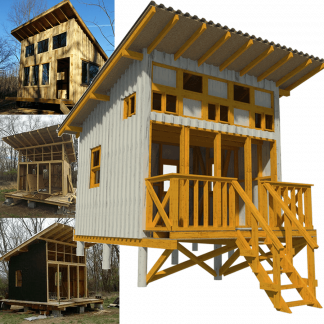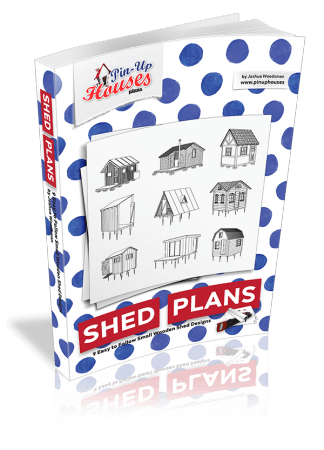

Our customer and self-builder purchased A-Frame Shed Plans Lily and modified the design slightly during construction. We bring you an interview where he shares his experience with you.
A-Frame cabin is located in a beautiful natural place, can you tell us at least approximately where you are from and where you are building?
I live in southeast Wisconsin. The build location is in central Wisconsin in an area with nice rolling hills of old growth oak forest intermixed with pockets of savannah and prairie grasses.

Have you been choosing between more of our designs?
Very early on we decided that we wanted a building that would blend into the scenery, and an A-frame style was a natural fit. We found this plan and it seemed perfect for us. It was the perfect size, we loved the look, and the design was super simple.
Which stage of the building process are you now at?
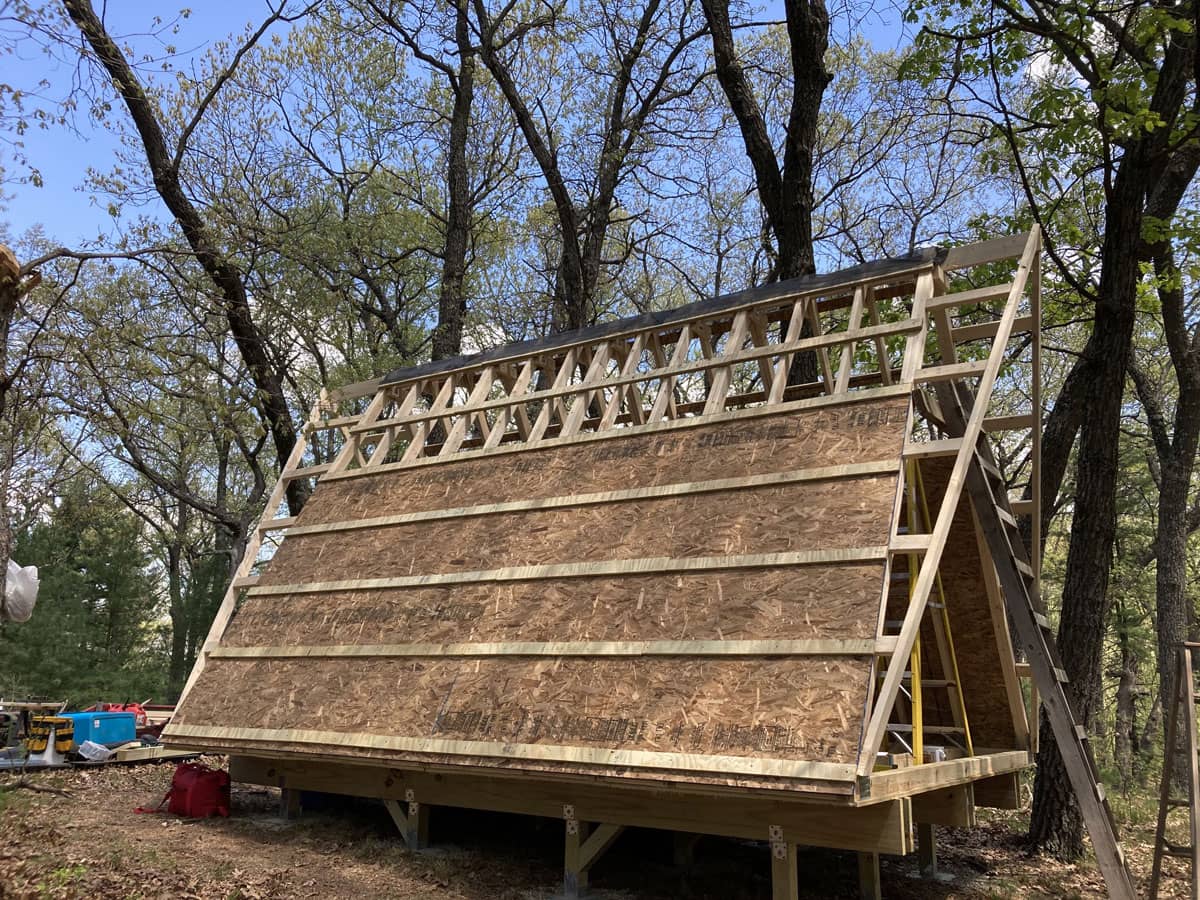
The building is “rough” finished. It has four walls, an entry door, and a rear window. End wall siding and roof trim are the last big projects.
Have you been building it to yourself (DIY) or with some professional help?
Total DIY. This has more or less been a one person job (myself), and I can tell you there have been no professionals involved.
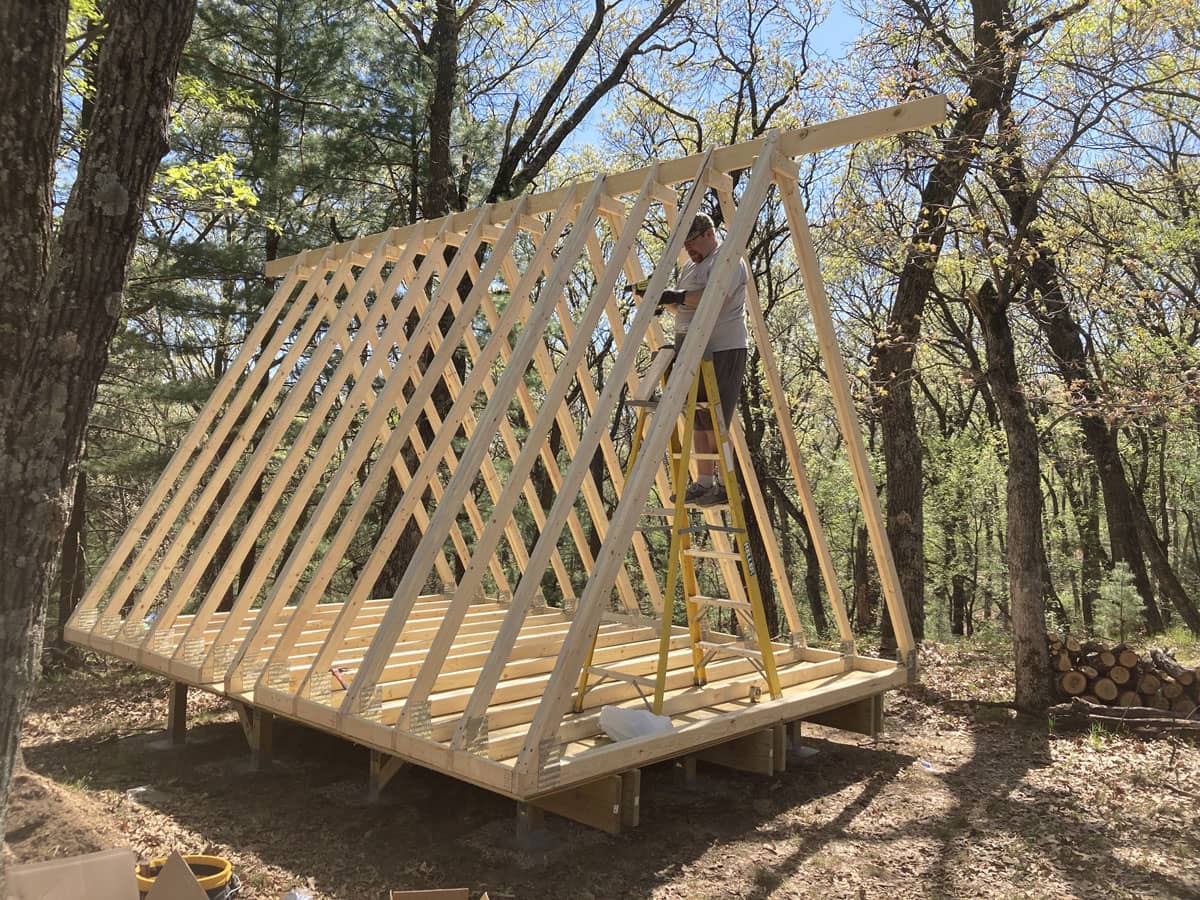
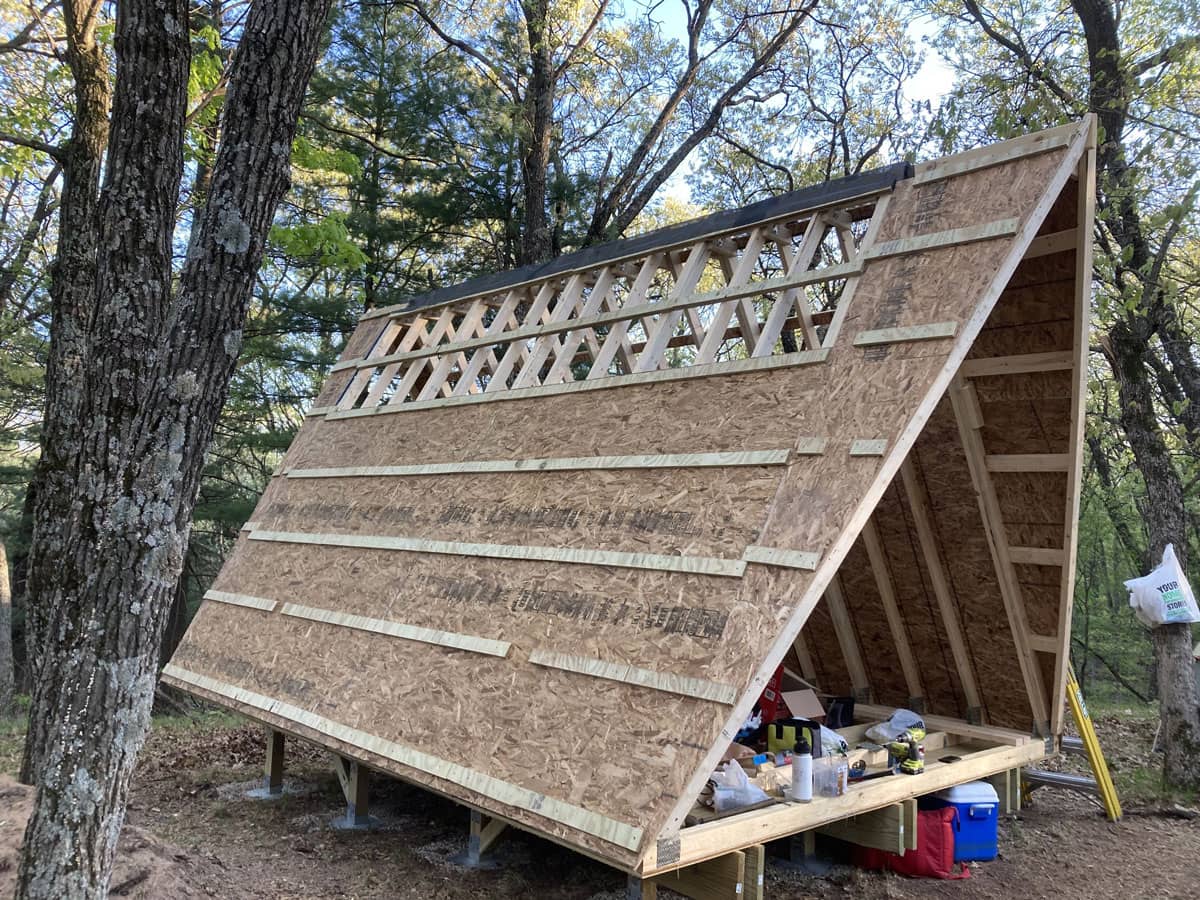
You opted for an unconventional but very hilarious roof overhang. Where did you get the inspiration for this shape?
When looking at the plans the way they were drawn up, I decided to eliminate the “entry” area and turn the entire floor plan into indoor space. This left minimal overhang for rain/snow. I decided the easiest thing to do was to incorporate a main beam at the top of the “A” framing and extend it out to create the overhang. I really wanted to keep the aesthetics of the triangular shape, but did not want to extend the foundation any so instead of squaring off the overhang, I used additional 12 foot boards to make the angles. I also wanted to keep the total length nominal, so with using 3′ ribbed steel the total beam length turned out to be 21 feet with a 3 foot overhang above the entry door, and a 2 foot overhang above the rear wall that we installed a 36″ x 48″ window in. The angles fit in great with the surrounding wind swept trees and also gives off somewhat of a MCM vibe which we totally love. It turned out to have a nice sleek look.
Have you read our book How to Build a Tiny House? If yes, did you find the content helpful?
I have not.
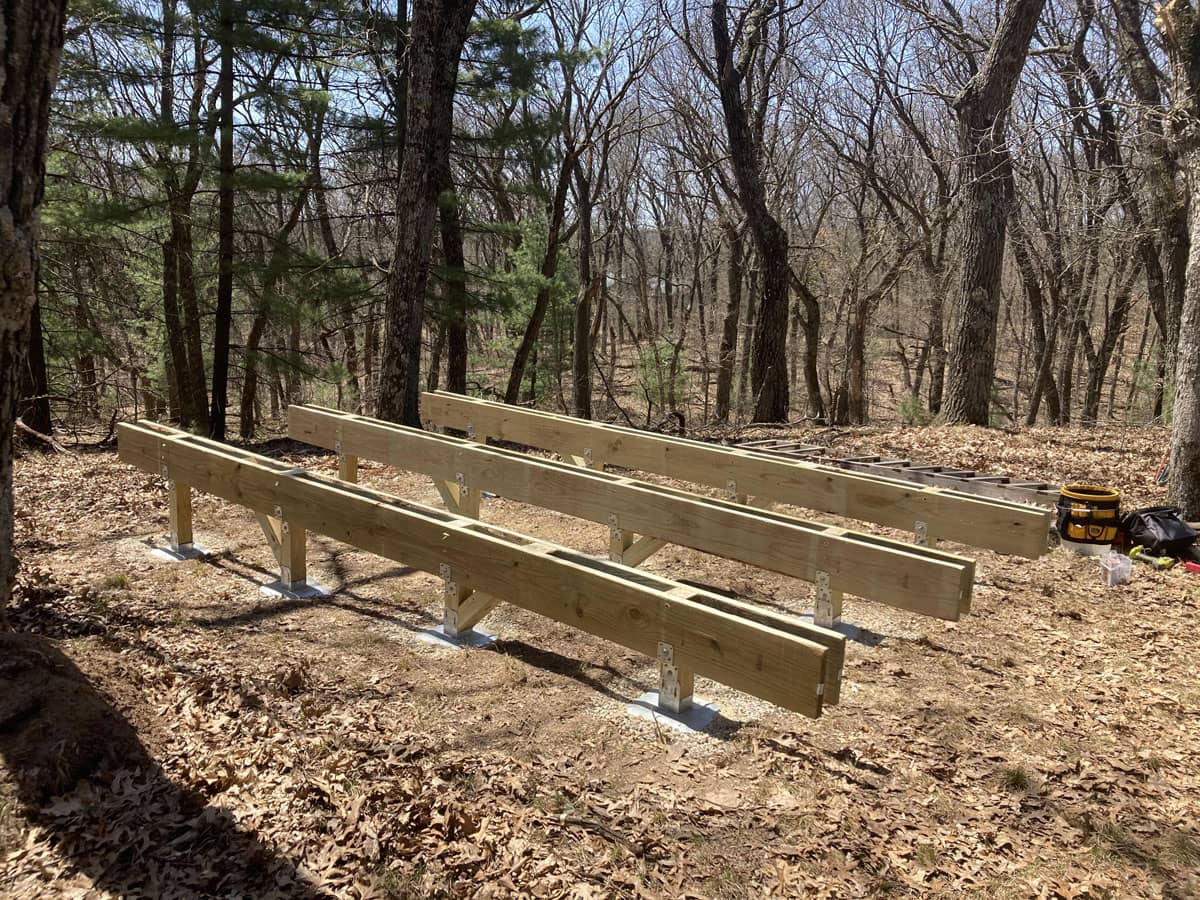
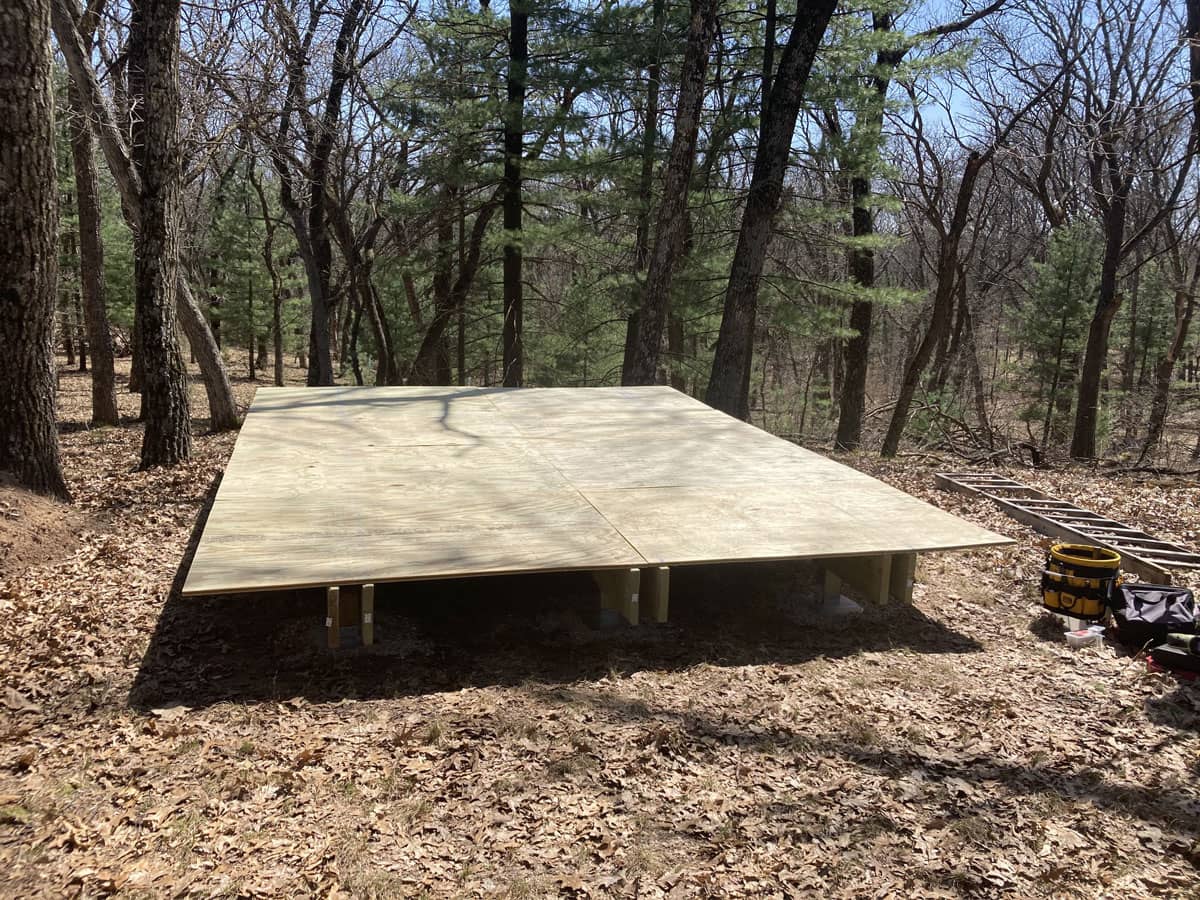
I can’t tell the exact type of foundation from the photos. Is it a concrete footing with metal fittings for a wooden post?
Correct, simple footing with upright post saddle. Exactly what you would put down if building a deck. I have 12 – 4×4 posts with 3 spans of 2×10 for the beams. (4×8 were very expensive at the time, as were a lot of the materials.)

You’re in the early stages of construction, are you planning to insulate the house?
I have insulated the floor spaces, and do plan on doing some sort of interior insulation. The location of this building does not give access during winter months, so it will be used as a three-season building.
How did you deal with the building permit restrictions?
Permitting is very easy in the town I am in. There is no electric or water, so it’s being treated as a “shed“.
Have you considered equipping the cabin with grids? (Water installation, electricity, …)
At some point we may end up installing some sort of solar grid, but no hurry there. As for water, we have no plans for a drinking water source, but will likely end up looking at rainwater collection in some capacity.
Any recommendations to new cabin builders who are just about to start their building journey or are deciding to buy our plans?
Because the location of the build did not allow a single load of material to be dropped off on site, I had to haul in materials over the course of 3 or 4 loads. This turned out to be very helpful as it both forced me to think about the build in stages (foundation, framing, roofing, end walls, finishings), and allowed me to do a lot of prep work at home with electricity and nicer tools. Doing the prep work (pre-cutting plywood, cutting all the framing angles, etc…) also gave me the opportunity to dry fit at home and preemptively make changes or adjustments prior to being on the work site. It made the build go very smoothly and much quicker than I ever thought. That was a long story about just making sure you are prepared. If you are going the DIY route, think ahead about what needs to happen and how you plan to accomplish each stage.