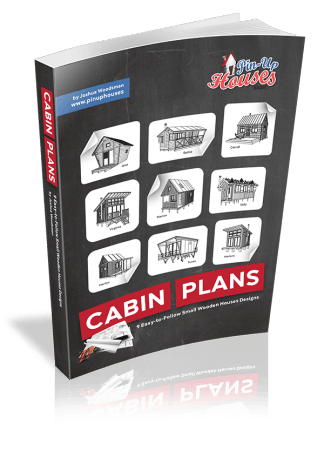

One of our DIY builders bought our Cabin Plans Set Book, choose Marlene, and started to build in the wild. This building is special mainly because it is built on foundations in water. He was so willing that he shared with us his rich experience from construction.

How difficult was it for you to create the foundation on banks? Anything you could recommend to someone in a similar situation?
Actually, the foundations were easy to build and install, then manage once the design was finished. Any metalworking shop can make them. Pillars are lengths of galvanized 3 inch well casing, 1/4 inch thick for walls. The brackets linking pillars to the structure are simply tubes of larger well casing segments (1/2 inch thick) welded to 1/2 steel brackets carrying the 6×8 inch larch beams. A total of 4 main beams carry the structure on 8 pillars. Under the building 4 extra pillars with jack post style threaded, extendable support carries the center of the beams. The front porch (7 ft x 16 ft) rests on a few pillars as well. Cross members of 3 x 5-inch larch pieces stabilize and solidify against wobble in wind. The floor on its adjustable leg system was built on the ground near the lake, come winter ice, plastic skis cut out from a plastic barrel were placed underneath each leg so the structure could be pushed to its shoreside location with a small tractor on the ice. Then, with a chain saw, ice under each leg was cut and the leg dropped and secured. Then, the soft mucky bottom issue making leveling difficult was compensated for by the adjustable legs. As the cabin floor sank slowly and unevenly, each leg was cranked with a 4 ton come along. By cranking, the floor rose or the leg sank deeper, the lesser resistance prevailing. Leg adjustment was done 4 times in the course of one year before base plates found firm packed clay footing under the muck.
Have you been choosing between more of our designs?
Our cabin is an adaptation of your Marlene which we modified a bit. We thought the loft could benefit from a higher ceiling so one could walk standing by the wall. Other modifications to the Marlene design were to reduce the front roof overhang length because of high wind concern during storms. And also lengthen the back overhang to shelter a small woodpile and the bathroom addition.
Have you been building it for yourself (DIY) or with some professional help?
The project is by myself only in my spare time and is somewhat of a personal poetic expression…. with your mandatory help through Pin Up Cabin Plans. It is my first attempt at building a complete structure. In February and March, I will be installing windows and doors and installing the board and batten siding from very wide pine boards milled from logs on our land. I’ll send pictures in the spring of the finished exterior.

What became the most challenging thing for you during the whole process?
Most challenging thing was to conceive the water foundations! The rest was just work.
Have you read our book How to Build a Tiny House? If yes, did you find the content helpful?
I did not read Building a Tiny House yet but would be interested.
Have you considered equipping the cabin with grids? (Water installation, electricity, …)
The walls will contain wiring for optional 110 AC volts and 12v solar powered stuff from a panel to be mounted on the cedar shingle roof. Also, I am adding a small peat moss based toilet 3 x5 ft in an extension on the back porch. Water and propane will be from tanks concealed under the structure in slide-out drawers. And of course, I will install the most beautiful enameled small wood stive I can find 🙂
How do you plan to manage the heating? Did you install a stove or a central heating system? Any recommendations for future potential builders?
Since I was a beginner when reading the book and preparing the project I had to buy a Dewalt construction manual to understand the basics such as how do you frame a corner, how to attach rafters to the top plate, how to fit my roof beams on the slopped double plate of the top wall etc. The next publication could have a generic section on the very basic of framing.


And in ending I must state how enthused I was when I found your cabin designs and book online! I spent many many hours sifting through quality schematics and ideas before picking a model. The whole project would not exist if I didn’t have your book in hand.
Here are a few pictures of my permanent 30 yr life expectancy decks. 2×10 inch dry hemlock planks double-coated with Sickens stain. They are fastened with new generation GRK self-tapping fasteners in 6 x 6 in larch timbers. Each lag has a pulling holding strength of many hundred pounds ( 4 inch threaded in larch beams. The floating structure in the background is a mobile veranda on which to practice thai chi or yoga and floats on three 18 inch diameter HDPE culvers sealed at the ends. It hitches to my Marlene deck and can be polled in the middle of the lake for fun or a great original party with friends. A propane burner on the raft permits its signature dish, fresh fries, and lots of beer:)


Please find attached pictures of foudation brackets ( 2 types) and also pictures of how I bolted the roof beams to the double top plate of the wall. I also bolted the front beam holding the roof near the overhang ( storm winds) with 7 ft long 5/8 inch threaded rod down the wall and through the bottom wall top plate. I know it’s overkill 🙂 but the roof is now permanent on the structural beams. The cabin floor is also bolted to the foundation support beams.


And to compensate for the soft bottom, each leg is adjusted periodically. The top bolt of a bracket is loosened, then a 4 ton come along hand winch is hooked on one side to the top bolt and the other the top of the pipe. By cranking slowly, either the leg sinks more or the floor goes up, the one with lesser resistance prevails. It now sits on hard packed glacial clay deposits and has only moved by a few millimeters since the spring. The bottom of the pipes has a sole, 7 in x 7 in chanel steel segments to bite in the clay and prevent lateral slippage. Once embedded in the muck the 49 sq in the area creates a great suction force to be overcome by floating ice etc. 49 x 14.7 lbs per sq in plus the weight of the cabin and foundation. It will never move ( so I think:) uncertainty makes things fun and challenging.

Thank you for sharing your rich experiences, Richard; I’m looking forward to seeing the finished cabin, hopefully, continued in the next article!